Microsoft Copilot Studio + PrivSource
PrivSource MCP for Microsoft Copilot agents
Give your Copilot Studio agent secure, team-scoped access to PrivSource. Search live lower middle market deals, submit new deals for listing, work with buyside mandates and seller matches, and build buyer lists and target lists through one OAuth-managed MCP connection.
What your agent can do
Deal Network
Search available deals, review structured details, and send outreach when available.
Buyside mandates
Create and publish acquisition criteria, then review matched deals.
Seller mandate matches
Review matched buyers for your deals and contact the right mandates.
Buyer lists
Create, generate, review, refine, and enrich AI Buyer Lists.
Target lists
Build and refine researched company lists from natural-language filters.
Account-aware tools
Let the agent discover the workflows available to the authorized team.
Connect PrivSource to Microsoft Copilot Studio
Create a PrivSource MCP tool, authorize your team, and add it to a Copilot Studio agent.
https://api.privsource.com/mcp
-
1
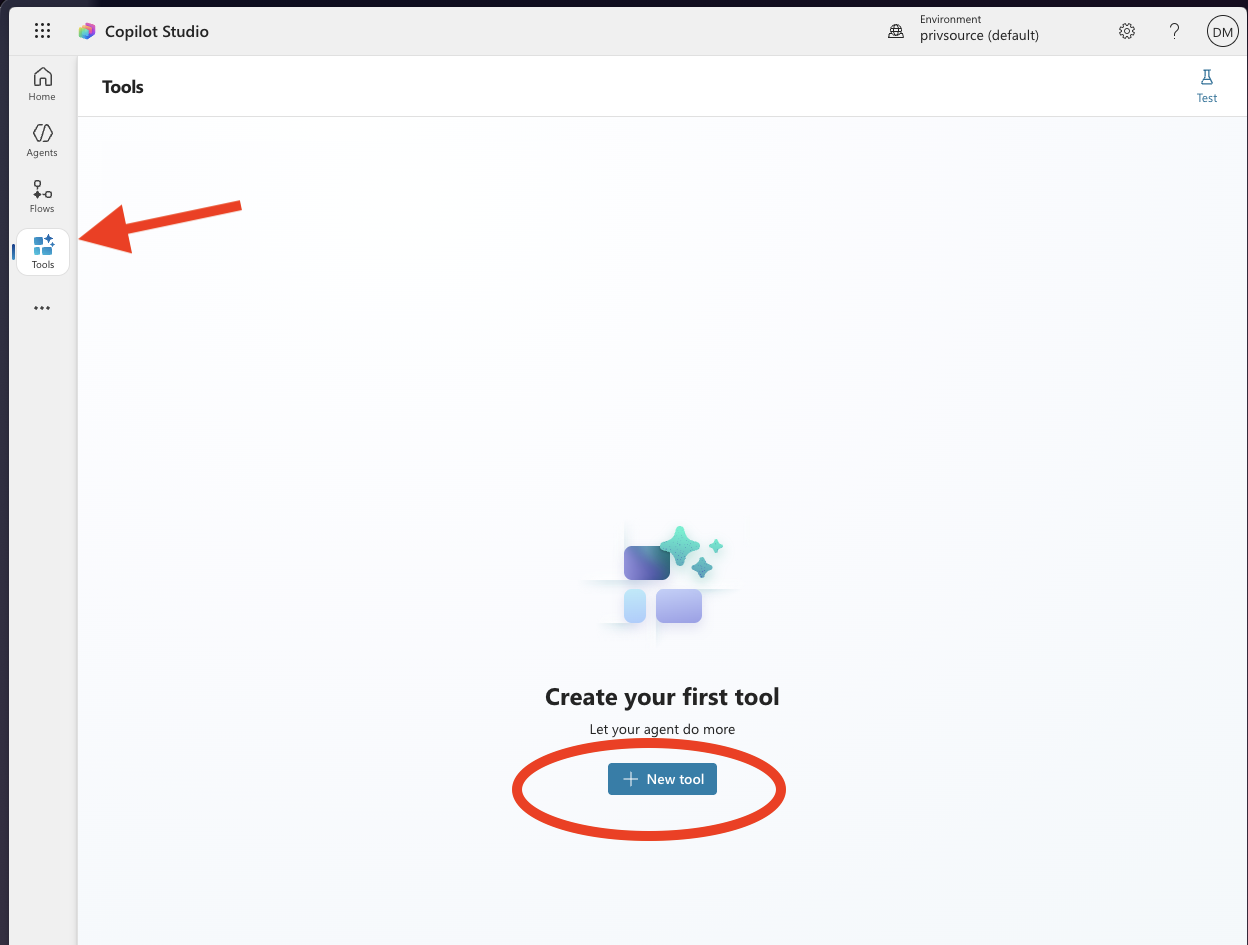
Create a tool in Copilot Studio
Open Tools in Copilot Studio, then select New tool.
-
2
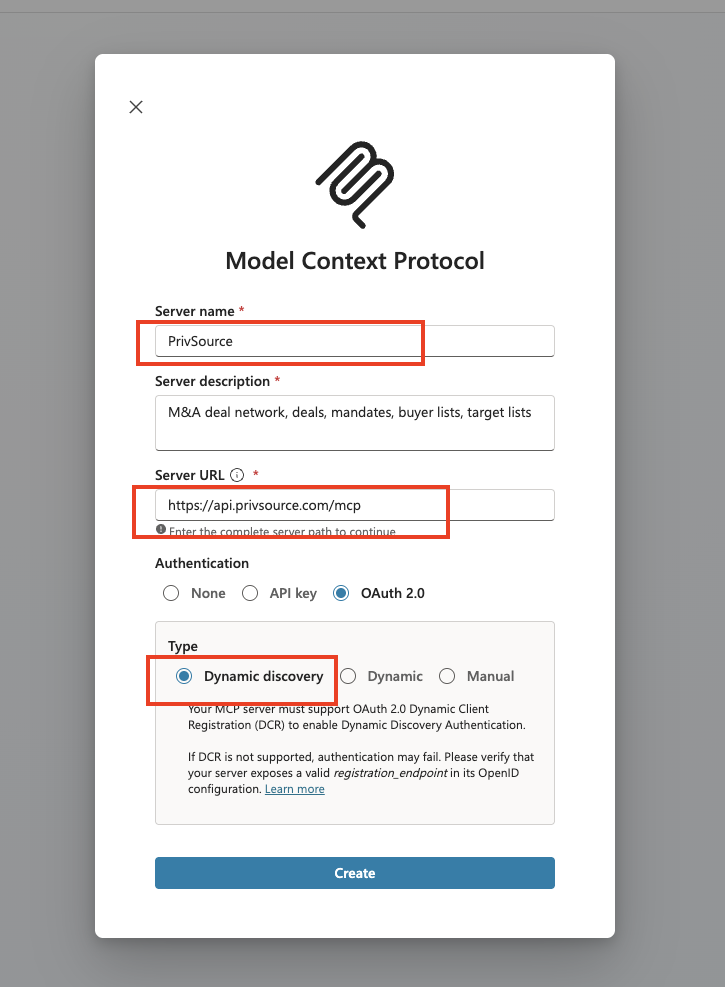
Configure the PrivSource MCP server
Choose Model Context Protocol. Name the server PrivSource, describe when your agent should use it, enter the PrivSource MCP URL, select OAuth 2.0 and Dynamic discovery, then select Create.
-
3
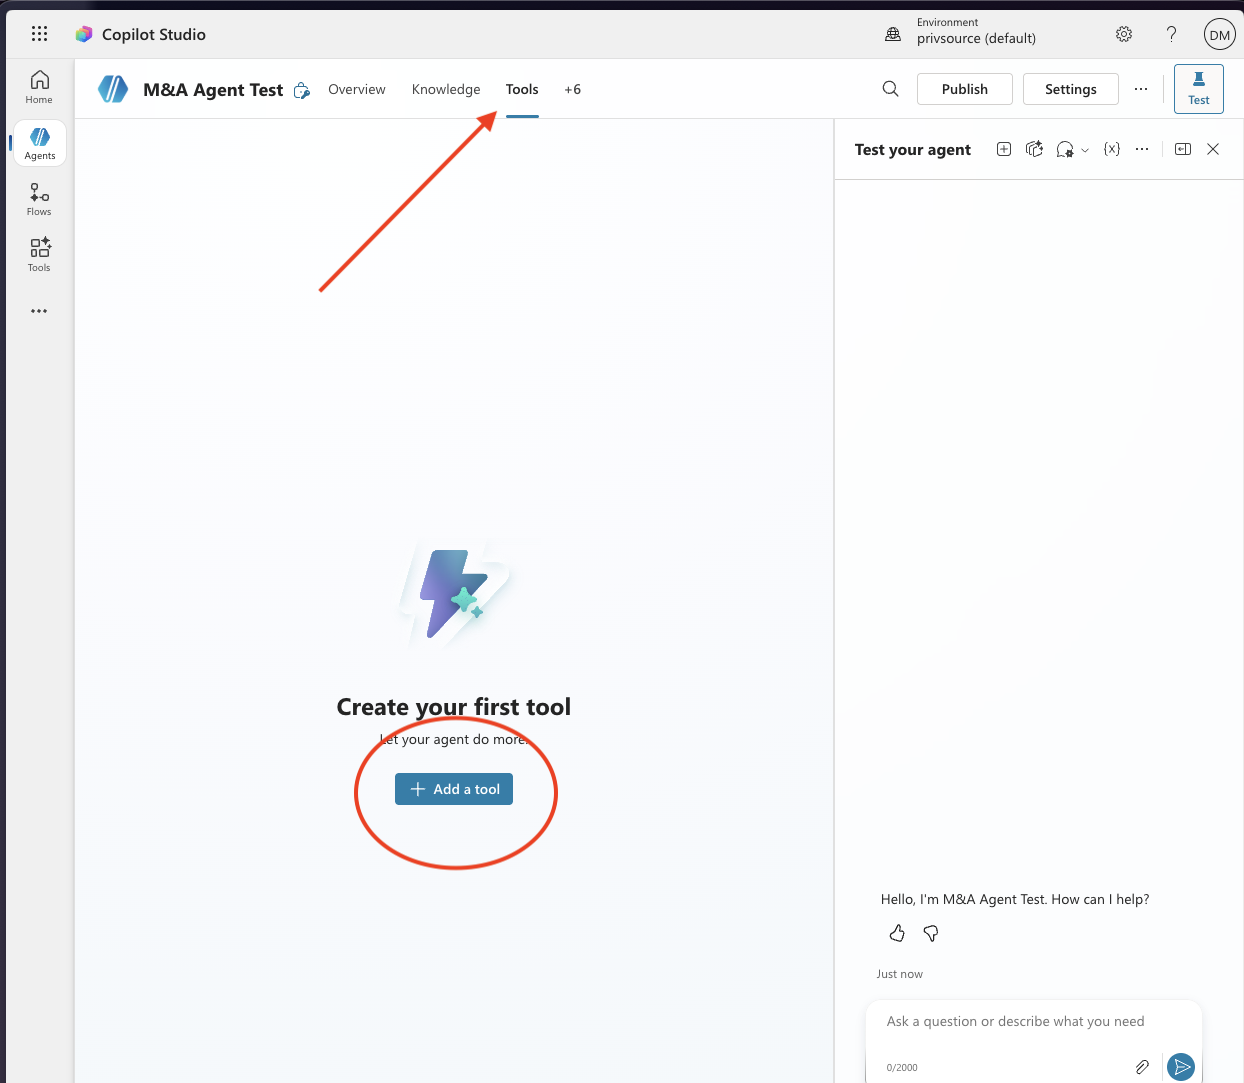
Add a tool to your agent
Open your agent, select Tools, then select Add a tool.
-
4
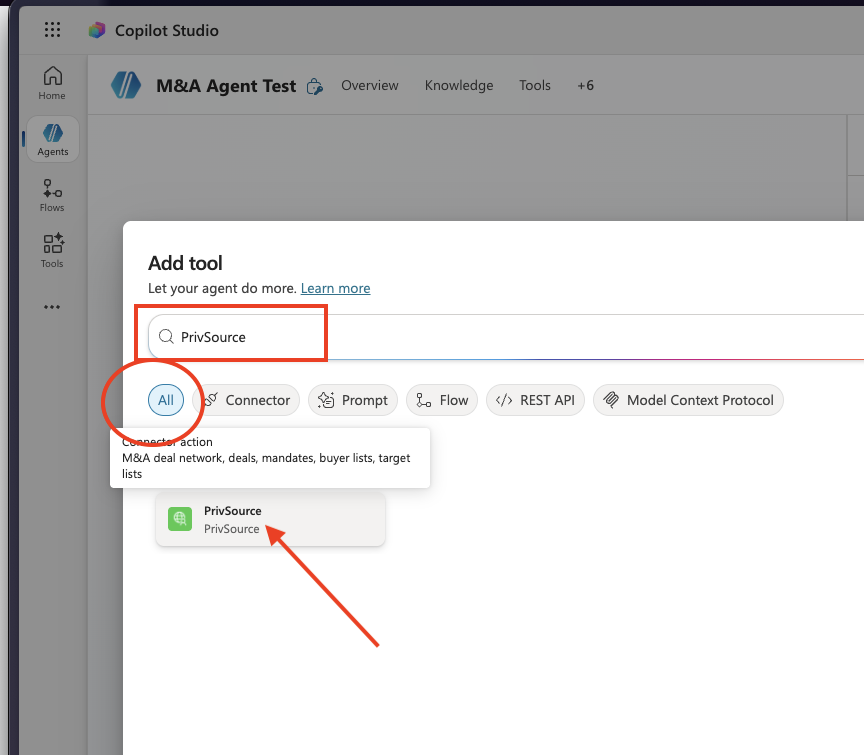
Select PrivSource
Search for PrivSource and select the PrivSource tool you created.
-
5
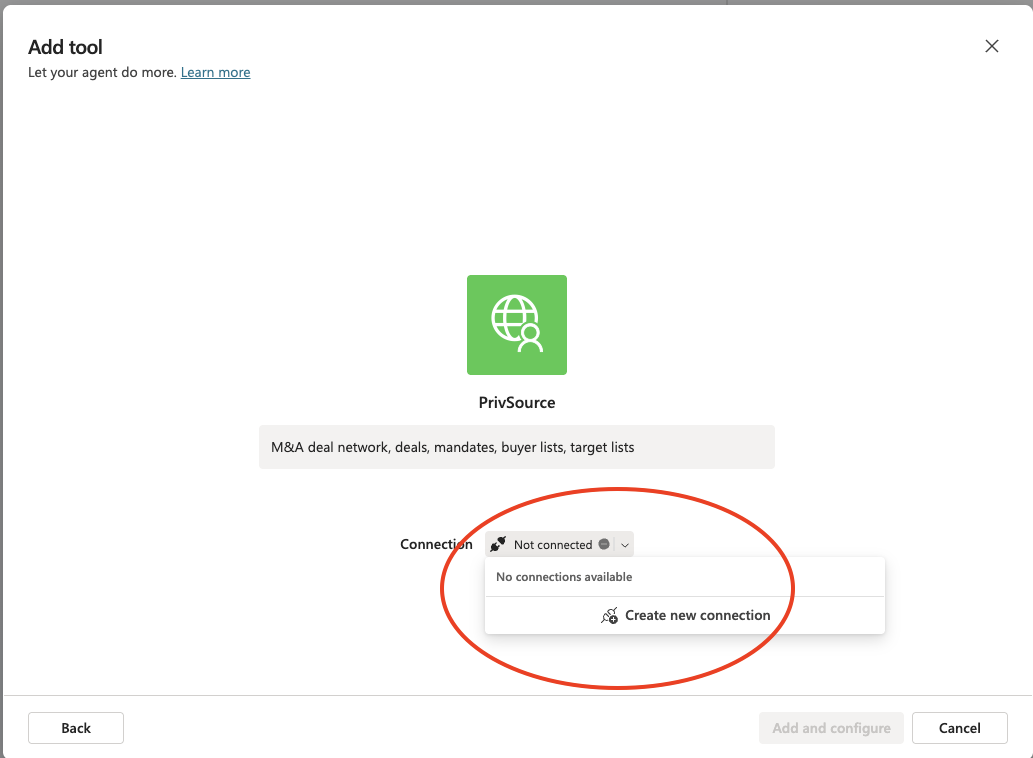
Create a connection
Open the Connection menu and select Create new connection.
-
6
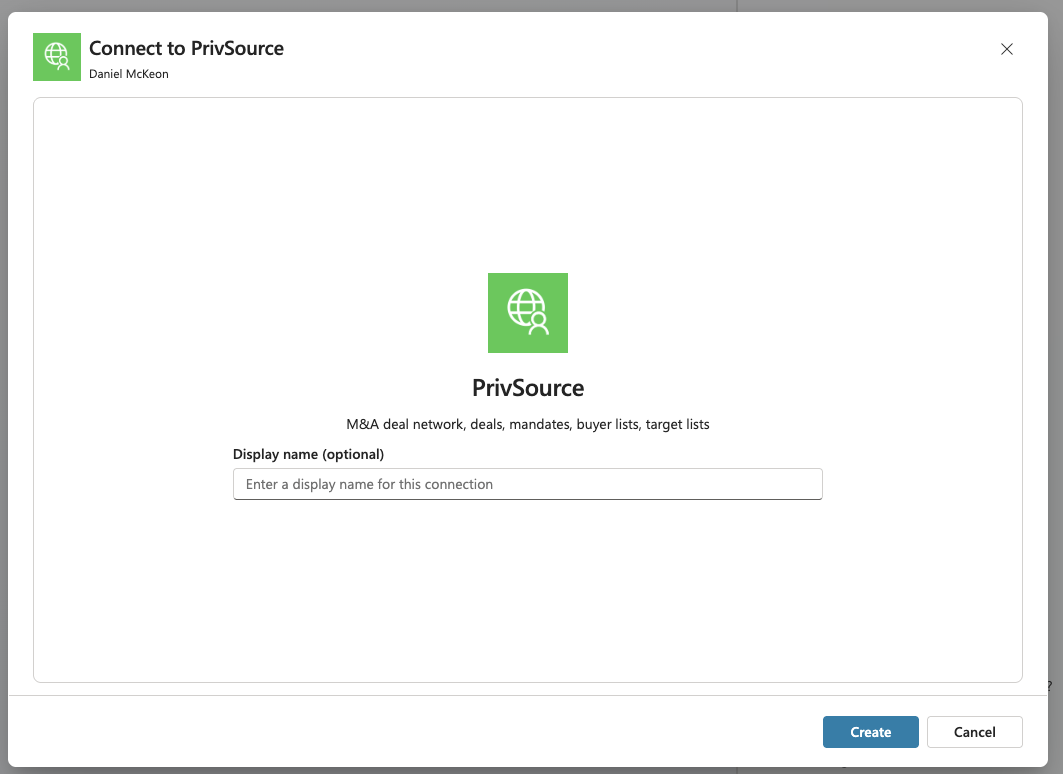
Start the PrivSource connection
Optionally enter a display name, then select Create.
-
7
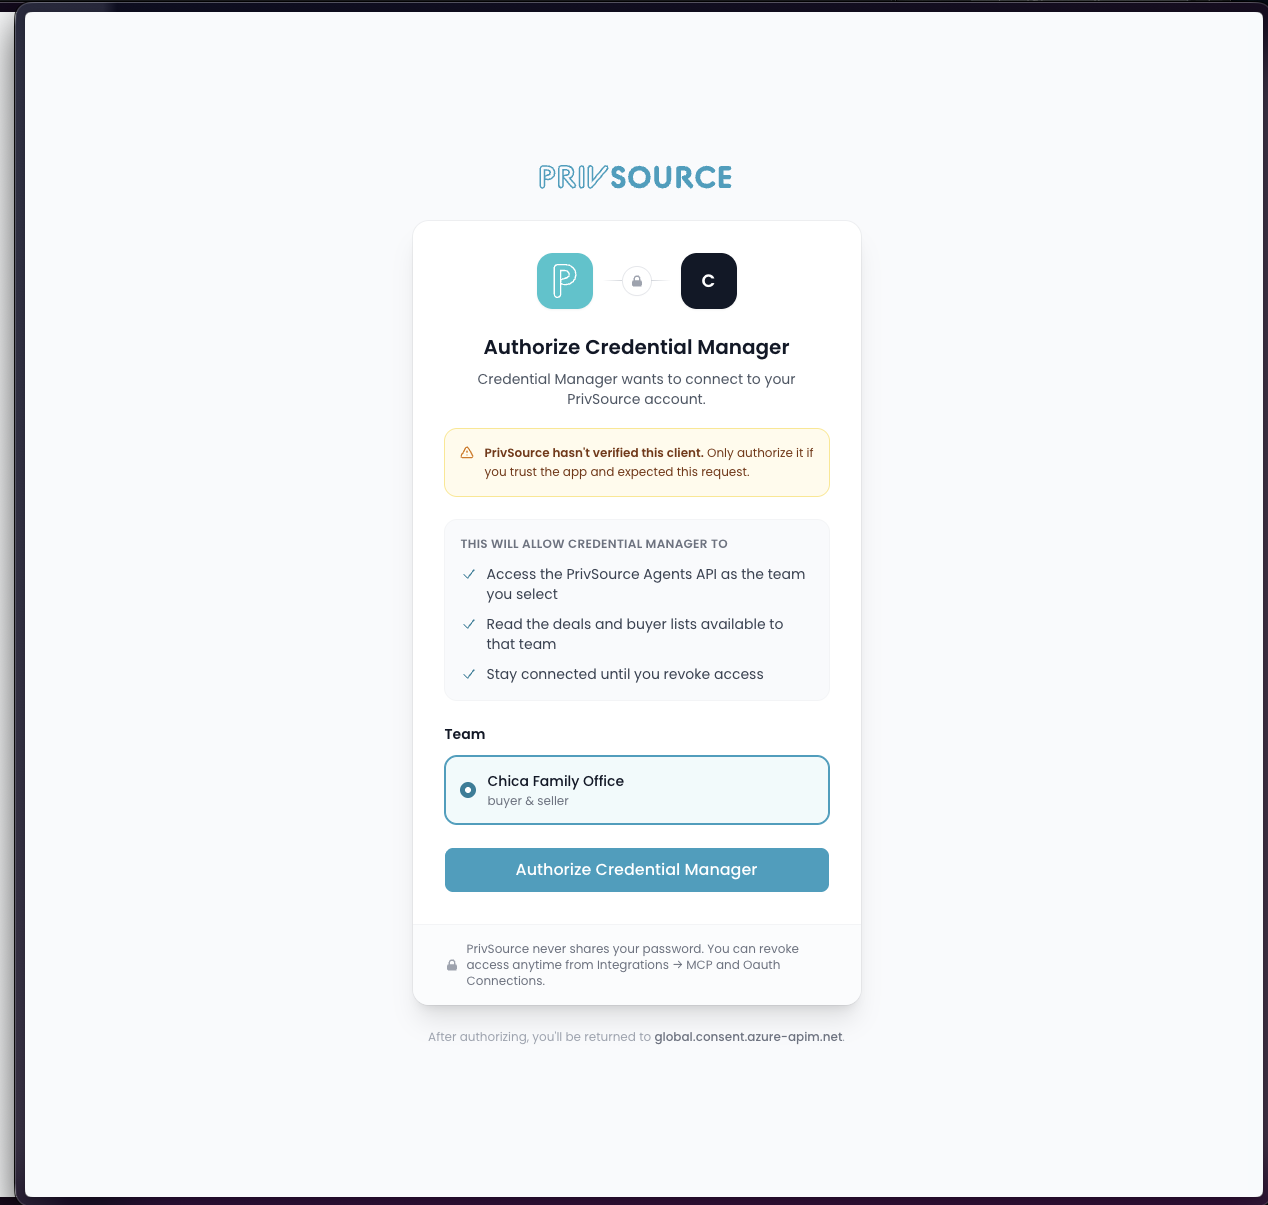
Authorize your PrivSource team
Sign in to PrivSource if needed, select the team the agent should use, and authorize the connection.
-
8
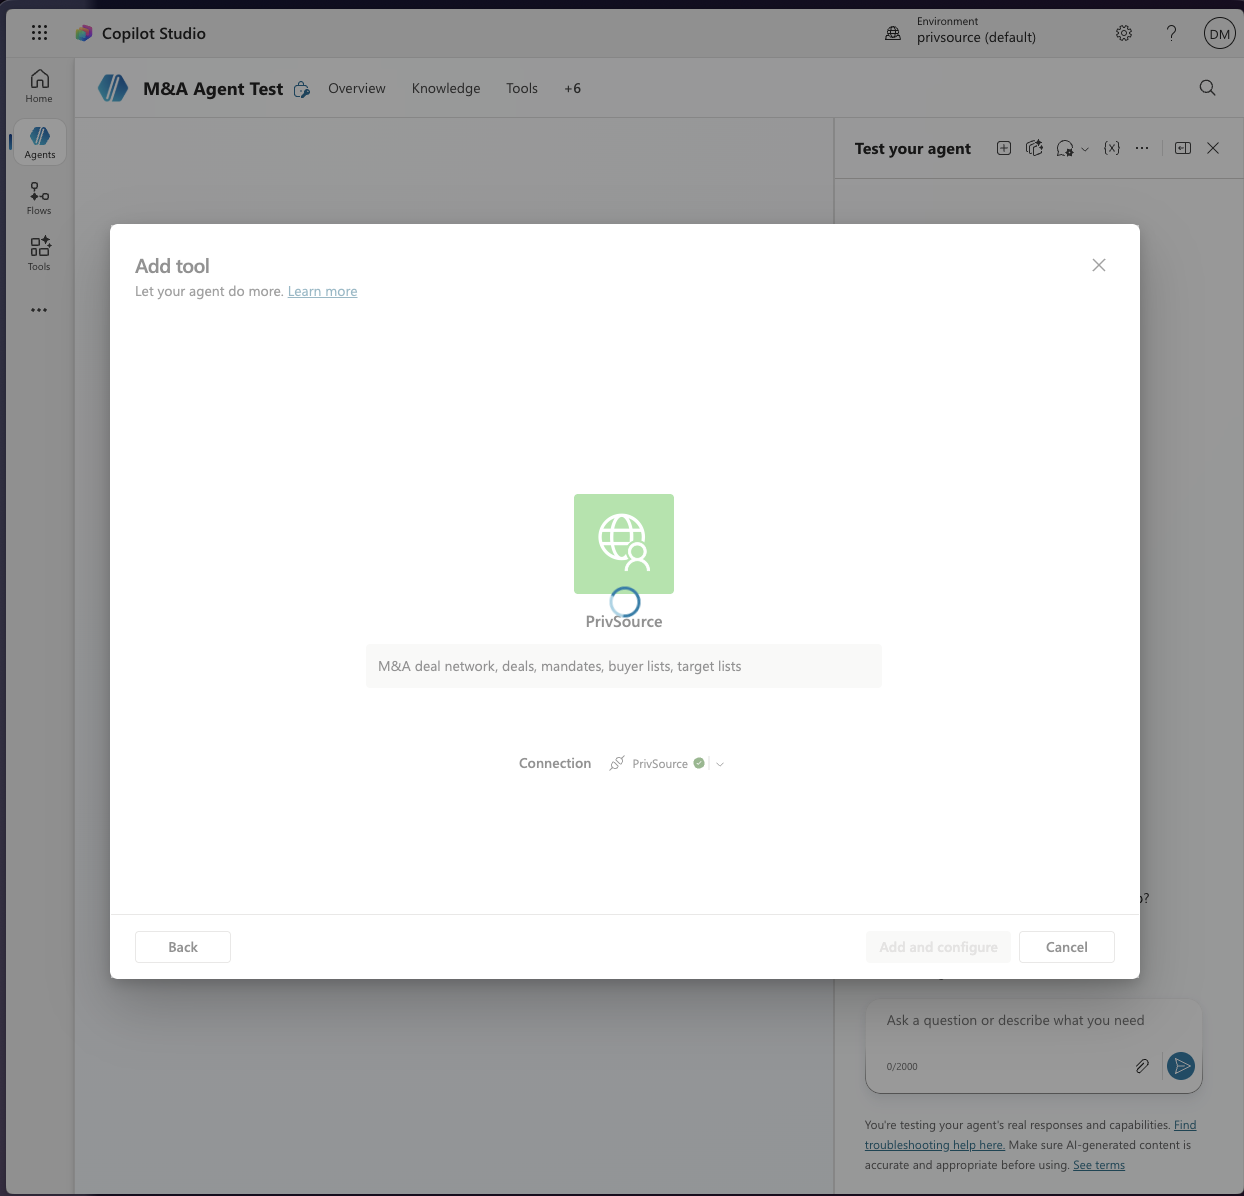
Add PrivSource to the agent
Return to Copilot Studio. Once the connection is ready, select Add and configure.
-
9
Confirm the connection
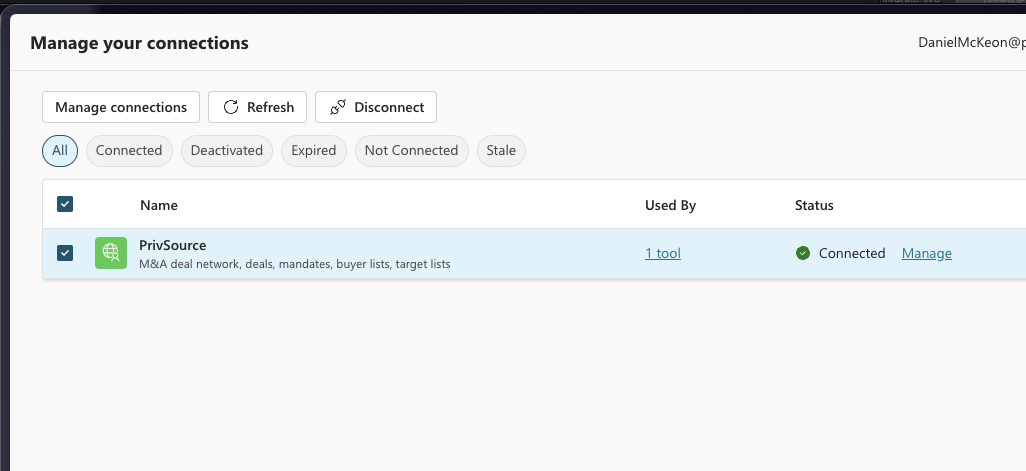
PrivSource now appears as connected in Manage your connections. Your agent can discover the MCP tools available to the authorized team.